For day 3 of the countdown to Christmas series, our theme was inspired by. I recreated a fun fold card from one of Michele’s previous videos. I had a lot of fun making this card. Here if the video so you can watch my process.
For day 4, the theme was thank you. I used a die cut and some odds and ends from my stash to make a quick card.
Make sure to check out Michele’s videos. You can find her channel below. Make sure to subscribe to both channels and comment on the videos to be eligible for the prizes. Check out our intro videos for full details on the giveaway.
I have been slacking with sharing my Halloween projects with you! I know you are probably thinking… but Marie you just posted a Christmas card. You are correct. I am going to be bouncing around with my content for the remainder of October. I will be sharing 2 Christmas projects a week and at least one Halloween/fall project. At least that is my goal.
Card #7 is a flat shaker card made using a well-used dryer sheet and googly eyes. I will link to that video below and I will also share the entire Halloween playlist so that you can catch up on any videos you may have missed.
I am joining Michele from Scrapsecrets for her yearly Countdown to Christmas Card Series. This series will be 25 Christmas projects. We will be sharing 2 videos a week, on Mondays and Fridays.
The theme for today’s project is ink blending. I have created a slimline card with a snowy winter sky as the focus. I used retired Stampin’ Up! stamp sets. The distress oxide inks that I used were: Tumbled Glass, Stormy Sky and Chipped Sapphire.
Check out my intro video for all of the details on the giveaway for this series.
I am joining Michele from Scrapsecrets for her yearly Countdown to Christmas Card Series. This series will be 25 Christmas projects. We will be sharing 2 videos a week, on Mondays and Fridays. The theme for day 1 was using the same stamp set. I purchased the Honeybee Stamps St. Nick stamp set last year but due to shipping delays, I was not able to use it for the holiday season. I am excited to be using it for this project. I have heat-embossed the image and water-colored it.
There will be giveaways at the end of this series from both channels. We have each posted an introduction video for the series that reviews what you need to do in order to be in the drawing for the giveaways.
This is a quick and fun way to give Hershey’s Nuggets. I always try to find a fun way to give candy to my niece and nephews for Halloween. This will hold 4 candies. You can adjust the height of the holder if you want to use fewer candies. This project can be easily customized for any occasion by changing the paper and images used. These would make great favors for any party.
The dark gray card stock is cut to 4 by 4 1/2. It is scored at 7″/8″ and 2 7/8″
The patterned paper to cover the candies was cut at 1″ by 3″. The paper was attached using double-sided adhesive.
Stamp set: Simon Says Stamp Spook up some fun (for the pumpkin and sentiment)
The pumpkin image was colored using colored pencils.
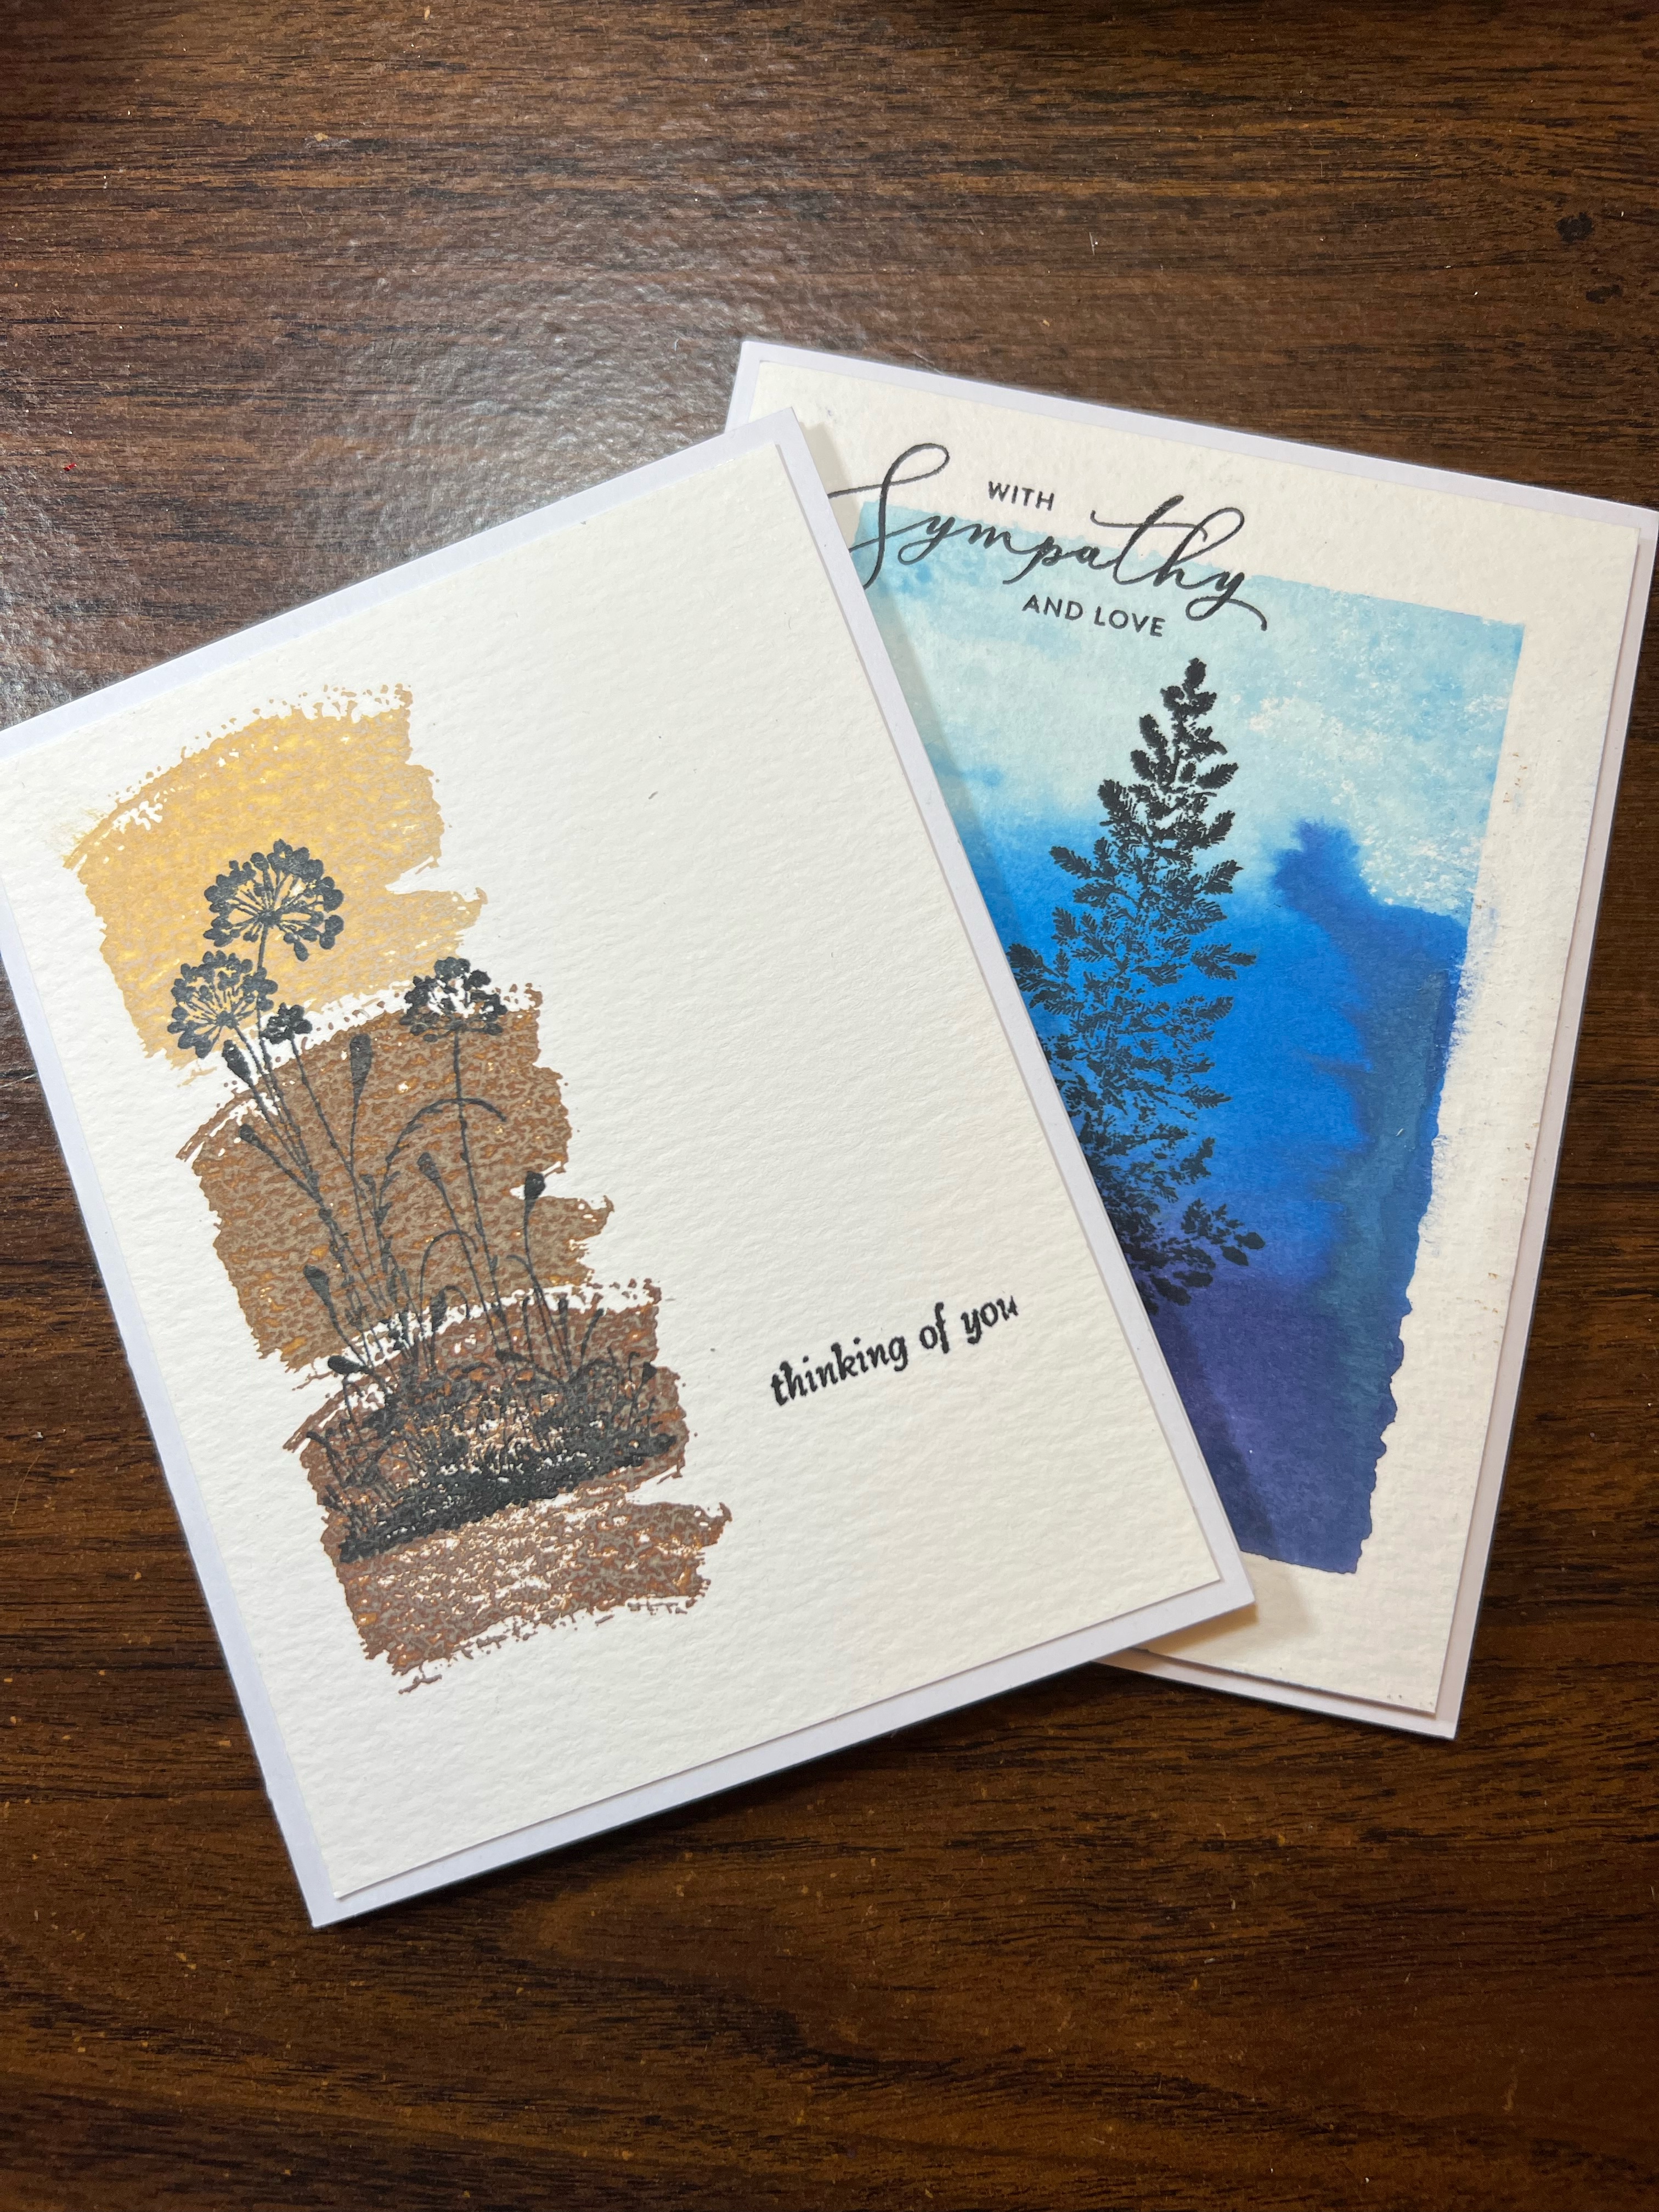
Masculine cards tend to be the most challenging to create (at least for me). My goal is to post masculine card options each Monday for the month of September 2023. I recently read a post in a craft group that someone was looking for ideas for masculine sympathy cards. This prompted me to create these 2 simple sympathy cards. It is much easier to create sympathy cards when you are not in need of them. Check out my YouTube video to see my process. Below is a list of inks and stamp sets that were used. These can be modified to use ink colors and stamps that you have on hand as many of the stamp sets I used are no longer available to purchase.
Card #1 Supplies:
Stampin’ Up! Work of Art stamp set (retired) used for the ink swoosh
Stampin’ Up! Serene Silhouettes stamp set (retired) used for the floral image
Stampin’ Up! Moon Lake stamp set (retired) used for the sentiment
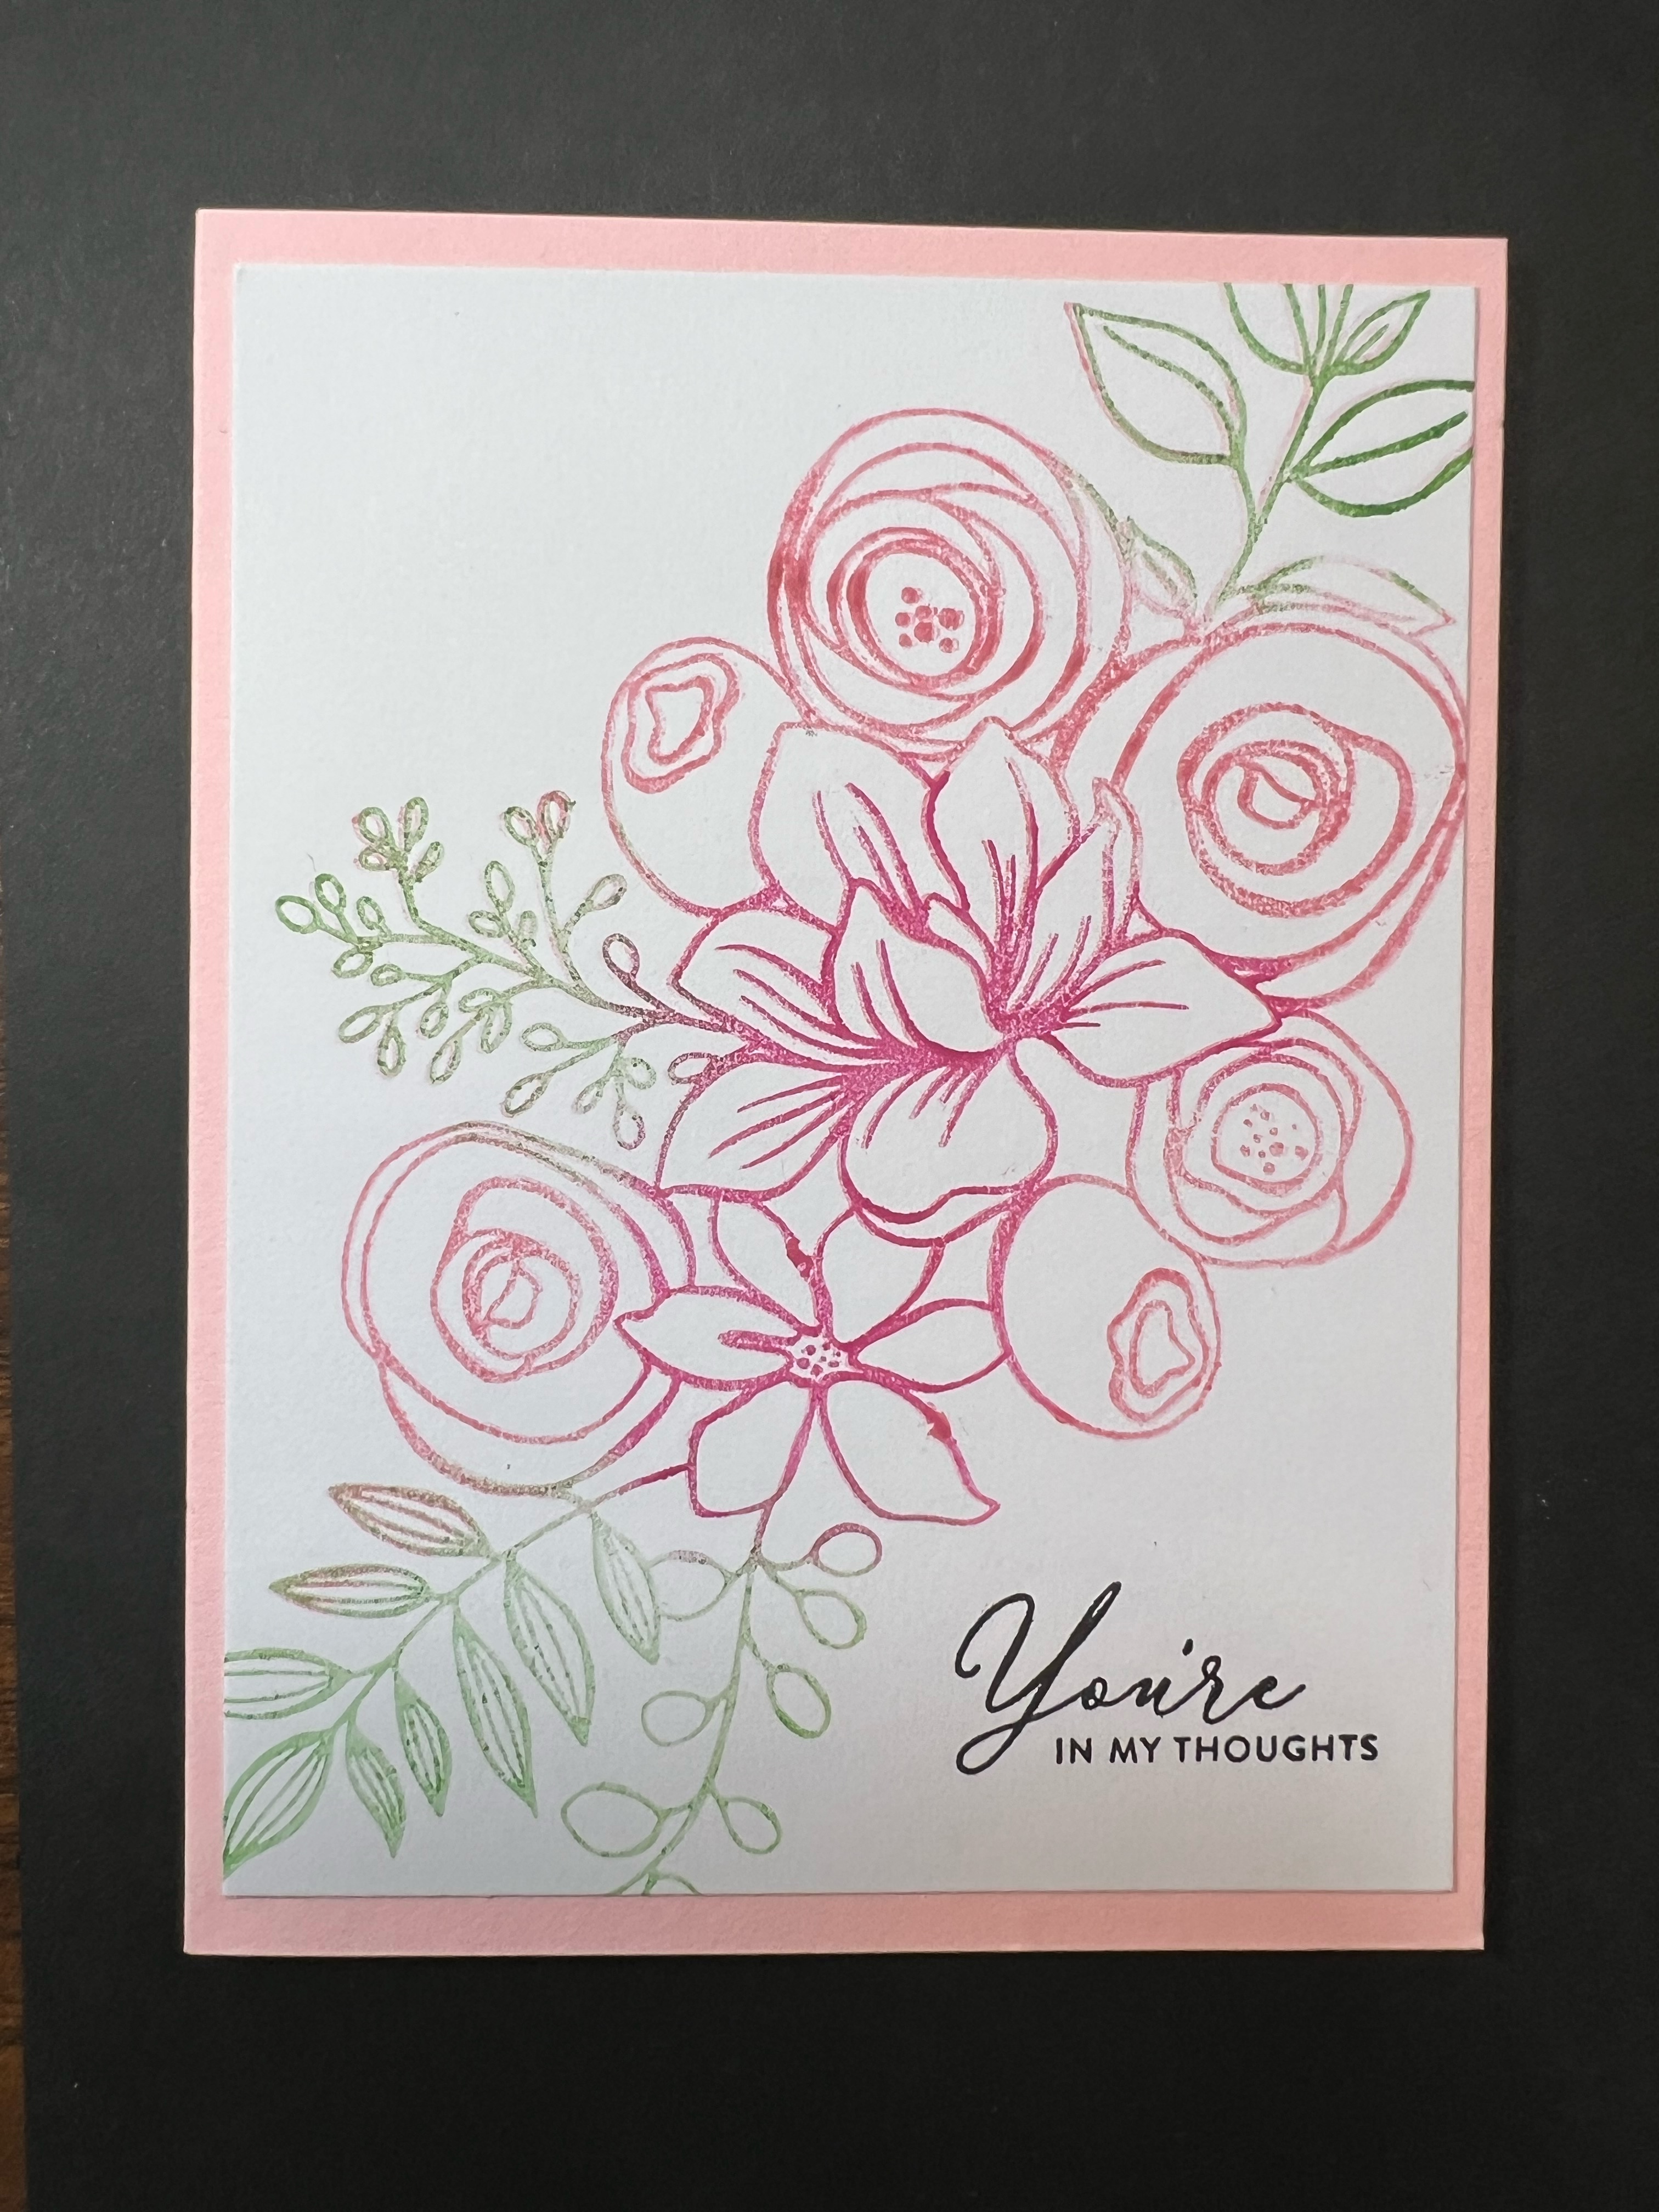
Today’s video is my contribution to this week’s color throwdown challenge. #ctd758 #colorthrowdown. The colors for this week were: pink, magenta, green, and white.
Supplies:
Simon Says Stamp Sketched Flowers stamp set
Simon Hurley inks used: Rosy Cheeks, Crown Me, Fake Plant
Versafine Clair Nocturne ink was used for the sentiment.
Here is the YouTube video if you would like to see my process. If you like what you see, consider subscribing to my channel so you have access to my content.
I was inspired by Dawn from W plus 9 and AmyR from Prairie Paper and Ink to create this Halloween card. I used the Honey Bee lovely layers rose die and added black soot distress ink to give it a spooky vibe.
I LOVE to make Halloween projects. I am kicking off my 2023 Halloween card series with a bright spiderweb card. Check out my video below to see how I created this card. Feel free to let me know in the comments if there are any projects that you would like to see me create!
The Handmade Happiness Facebook group has a monthly hop. Each month we are given a theme and 2 techniques to choose from. This month the theme was stripes and the techniques were either stickers or rub-ons. I chose to make a card and 4 Christmas tags using only stickers. Check out my YouTube video to see how I created them.